Stamp Duty Payment Procedure
How to Pay Stamp duty and Registration fees Online for Leave and License Agreement (valid in Nov 17)
Step 1. Go to GRAS Website: https://gras.mahakosh.gov.in/igr/
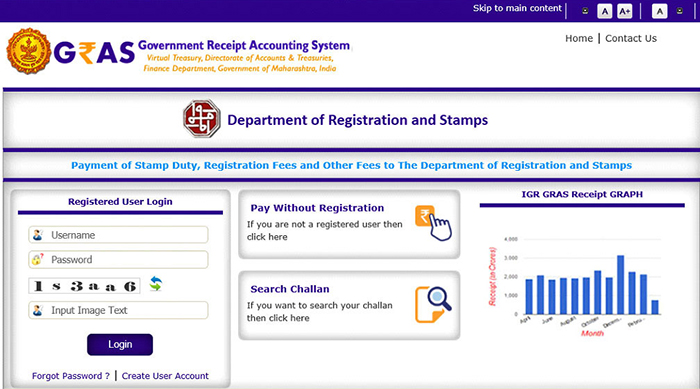
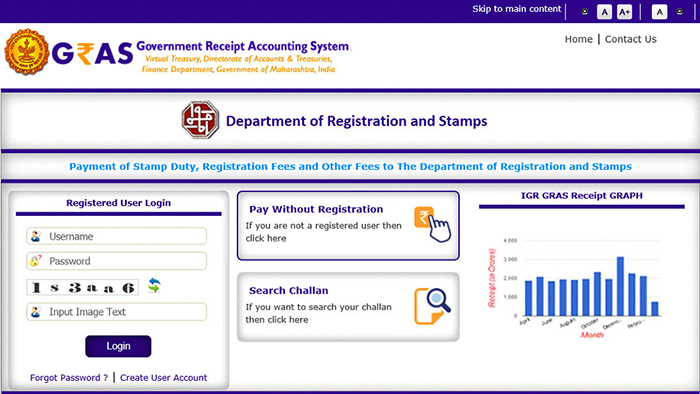
Step 2. Click on “Pay without Registration” box
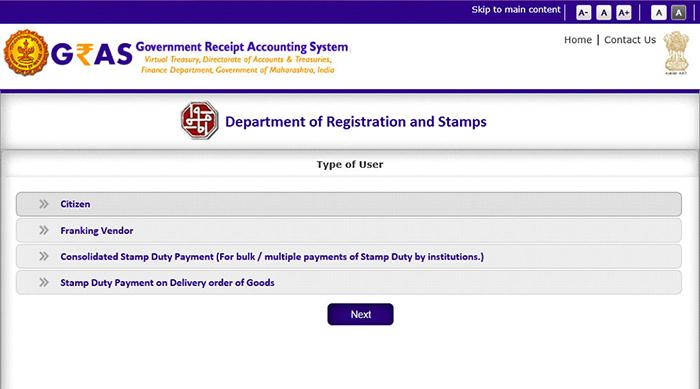
Step 3. On the next page, In Type of User, click on “CITIZEN”
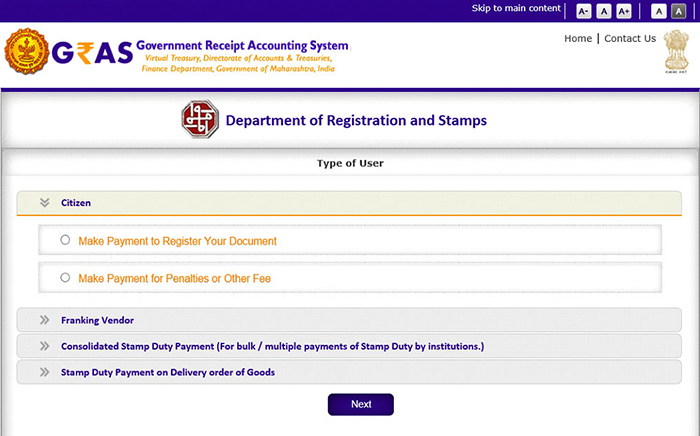
Step 4. Once you click on CITIZEN, you will see two drop down options:
- Make Payment to Register Your Document
- Make Payment for Penalties or Other Fee
Step 5. Select first Option “Make Payment to Register your Document”
Step 6. After you click on ‘Make Payment to Register your Document’, you will see three drop down options:
- Pay Stamp Duty & Registration Fee Together
- Pay Stamp Duty Only
- Pay Registration Fee Only
Step 7. Select first Option “Pay Stamp Duty & Registration Fees Together”

Step 8. You will be redirected to a new page.
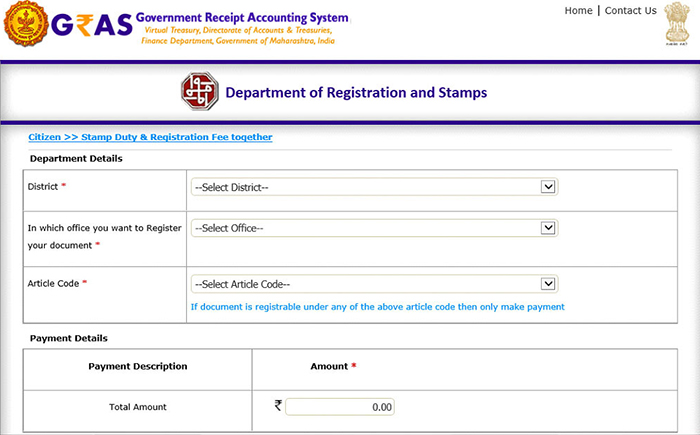
Step 9. In the next screen, enter the Departmental details.
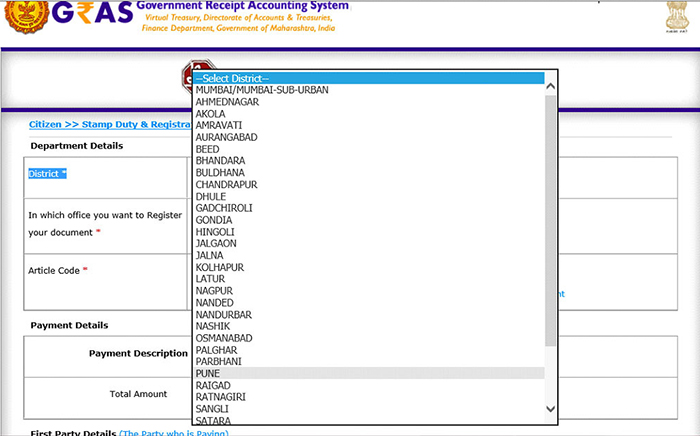
District field: From the drop down list, select “Pune:”
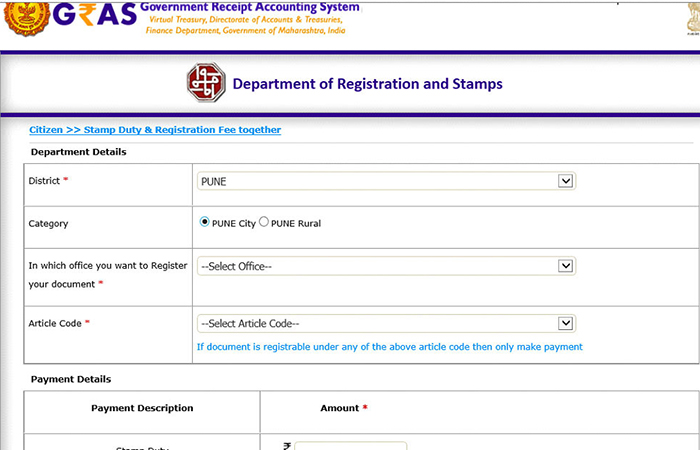
Step 10. As soon as you select Pune, you will see a new field named “Category”
If your property falls in jurisdiction of Pune city, select Pune City, Else select Pune Rural.
Property owner or Society can give you this information.
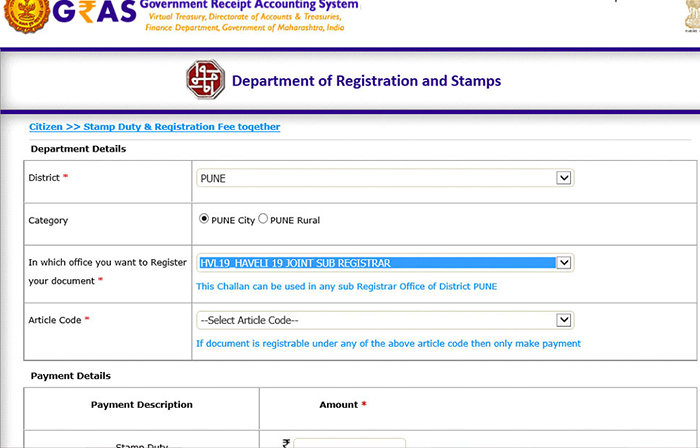
Step 11. Select the Registration office in which your Leave & License will get Registered from the drop down list.
For properties in Pune city, Select “HVL19_HAVELI 19 JOINT SUB REGISTRAR”
Step 12. In field Article Code, select “36A – Leave and License Agreement” from the drop down list.
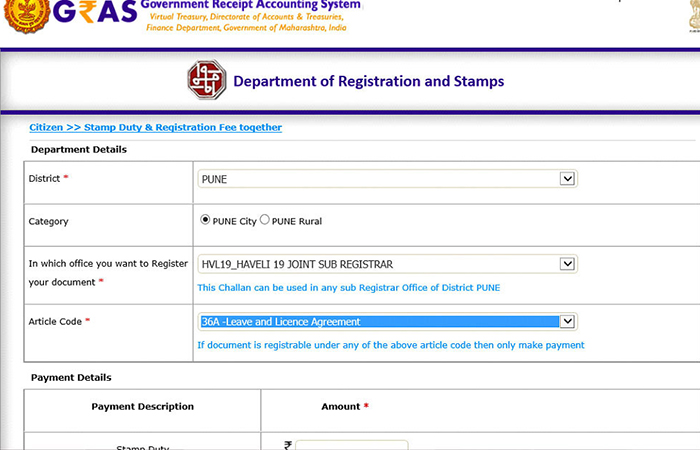
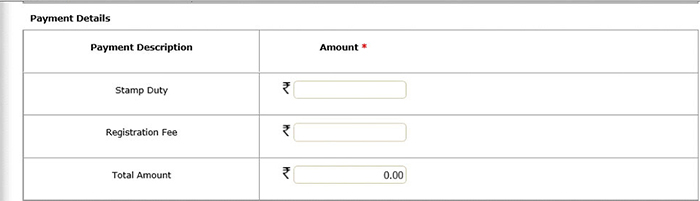
Step 13. In “Payment Details” section, enter the Amount of your Stamp Duty and Registration fee.
As you input Stamp duty and Registration Fees, the Total Amount will reflect automatically
Step 14. Next, enter “First Party details “
Enter Name of Payee = Owner’s Name
PAN of Payee and Mobile Number of Payee is optional.

Step 15. In “Second (Other) Party Details” enter tenant’s full name. If there are multiple tenants (e.g. 3 bachelors), enter the full name of one of them.
PAN of second party (tenant) is optional.

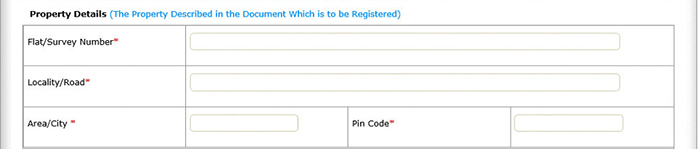
Step 16. Enter “Property Details“ : Mention the details of the property being rented out.
All the field in Property details are mandatory. No special character (such as # or ,) is allowed in property details.
- Flat / Survey Number: Enter building, flat and society details e.g. A-304, Rose Apartments
- Locality/Road: Enter Locality and Road or Survey No. E.g. Baner, S. No. 22
- Area/ City: Enter city name of the property: e.g. Pune
- Pin code: Enter Pin Code of the property e.g. 411045
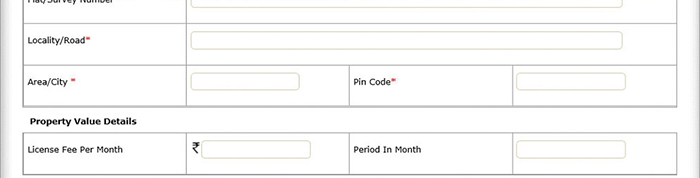
Step 17. Next part of the form is “Property Value details “
Note: this section is optional.
- License fee per month = Rent amount per month e.g. 15000
- Period in month = Duration of agreement e.g. 11
Step 18. Next Section is “Payment Mode” (of stamp duty and registration fee)
Note: this section is optional.
- Select payment mode: “e-Payment”
- Select bank: Select the bank from which you be making the payment of the stamp duty and registration fee. (should ne a nationalized bank account)
- Enter the Captcha Code as you can see in the image.
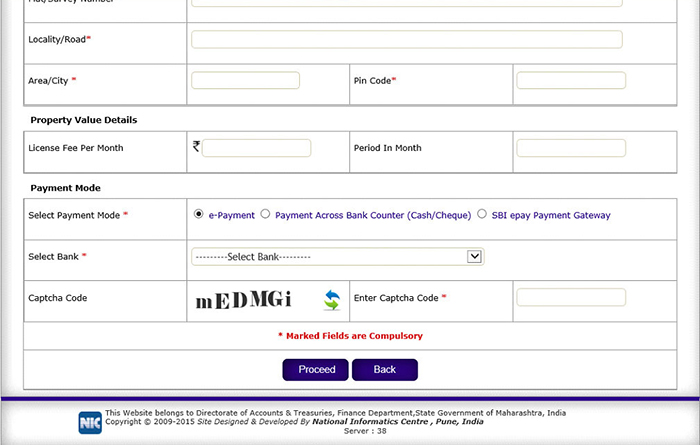
Step 19. Once you fill in the entire form, Click ‘Proceed. A Draft Challan will be generated.
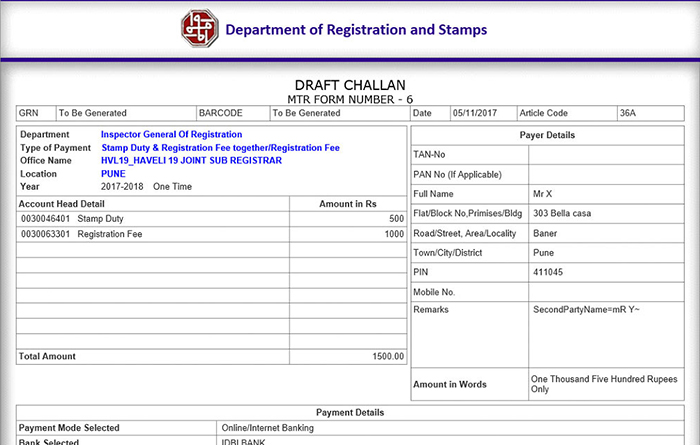
Verify all the information you have entered.
Step 19. If the data entered is correct, Click “Agree” and Proceed at the bottom of the Challan.
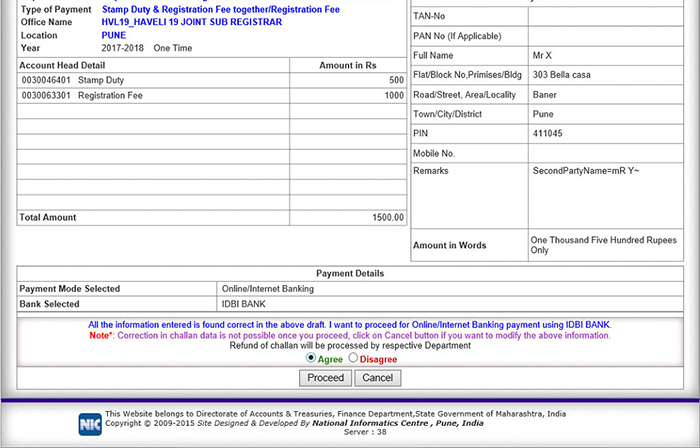
Step 20. After you click on Proceed , a disclaimer will pop up on screen asking if all the information you have entered is correct or not,
Click On “OK”
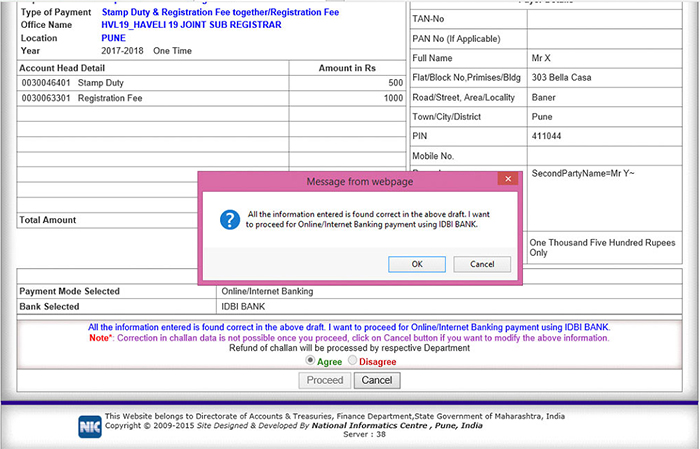
Step 21. As soon as you click on Ok, you will see a new pop up stating your “GRN Number “, Please write down that GRN number as it is important in case you loose the challan.
Click On “OK”
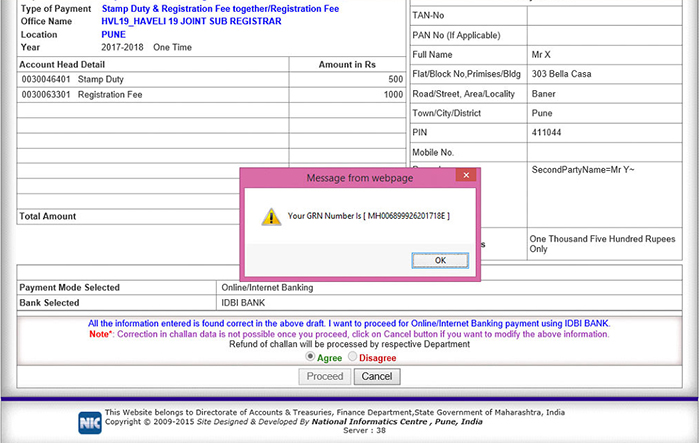
As soon as you click on Ok, a new bank window will open, fill in the net baking details and proceed to pay for the challan.
Once the payment is made, your final challan will be generated. Save the file (pdf), print it and keep It with you.